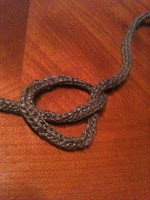
Talking about catnip made me want to make catnip toys. Plus, my cats have been glaring angrily at me every time I eat a chocolate egg.
No, really, cats. Chocolate is not good for you! So I thought I'd better make them a treat, too.
Now, a person more in keeping with the spirit of the season would make
egg cat toys or
bunny cat toys or at least
chick cat toys. But not me. I'm not making sweet cat toys. That would imply
sweet cats. And my cats are
anything but sweet when they are all hopped up on catnip.

My cats' reaction to catnip will vary from sleepy (Gracie) to manic (Achilles) to "You-talkin'-to-
me?" (Gabby). Pretty spicy. Spicy cats get spicy cat toys. Hence, this Catnip Chili Pepper.
This picture to the right, btw, does not depict a leaky catnip chili pepper. It's really more of a testament to why you should not have cats around when you are knitting this. (Unless you enjoy having it batted out of your hands while you are working.)
I've made these before. But I don't think I've ever posted a pattern. So here it is. I will also add a link to the sidebar so you can make your own
Catnip Chili Pepper for your own spicy cats.
CATNIP CHILI PEPPER(for spicy cats)
 Materials
-About a yard of red yarn, any kind
-About half a yard of green yarn, any kind
-Two #3 double pointed needles
-Pinch of catnip
-Seaming needle (to weave in ends)
-You will also need about 20 cat-free minutes to knit this. (This will be the hard part.)
NoteThis project is worked entirely in I-cord. The work is not turned, even on increase or decrease rows. At the end of the row, slide the work back down to the right end of the needle and knit the first stitch again.
To Make
Cast on 2 stitches with red yarn.
Work 3 rows of this 2-stitch I-cord.
Increase row: Knit 1, Knit into the front and back of next stitch, Knit 1. Then slide to the right end of the needle and continue making 3-stitch I-cord for 3 more rows.
Increase row: Knit into the front and back of stitch, Knit 1, Knit into the front and back of next stitch. (5 stitches)
Now work 5-stitch I-cord for 2 rows.
Knit 1, Knit into the front and back of next stitch, Knit 1, Knit into the front and back of next stitch, Knit 1. (7 stitches)
Now work 7-stitch I-cord for 2 rows.

Now stuff this part with catnip.
This is the dangerous part. 
Not because the hole is only about the size of the tip of your little finger, but because once you whip out that catnip, your cat is gonna get
really interested in your work.
Cut the red yarn,if you need to, leaving a couple of inches to weave in. (I was at the end of my yarn, so there was no need to battle dpns, cats,
and scissors.)

Attach the green yarn. Knit 2 rows of 7-stitch I-cord in green. (Tip: I run the red tail and both parts of the green yarn over the first 4 stitches to lock them in. Then I just tuck the remaining tails into the body of the chili. That's two ends I don't have to weave in. And that's time I'm not holding the thing while my cat is getting impatient, waiting for me to weave in ends.)
Decrease Row: Still working in I-cord, Knit 2 stitches together three times, Knit 1. (This will give you 4 stitches.)
Decrease again in the very next row by knitting 2 together twice. (Now you have 2 stitches.)
Work 3 more rows of 2-stitch I-cord, then bind off.
Weave in the ends.
Quickly.

Toss it to your cat. Take my word for this. You don't want to hold it in your hand any longer than you have to.


